Podia Integration for Nudgify
How to Install Nudgify on Podia?
It only takes a few minutes to install Nudgify on your Podia site.
With Nudgify, you can add Social Proof, FOMO Nudges and many more to your Podia site to boost your conversion rate.
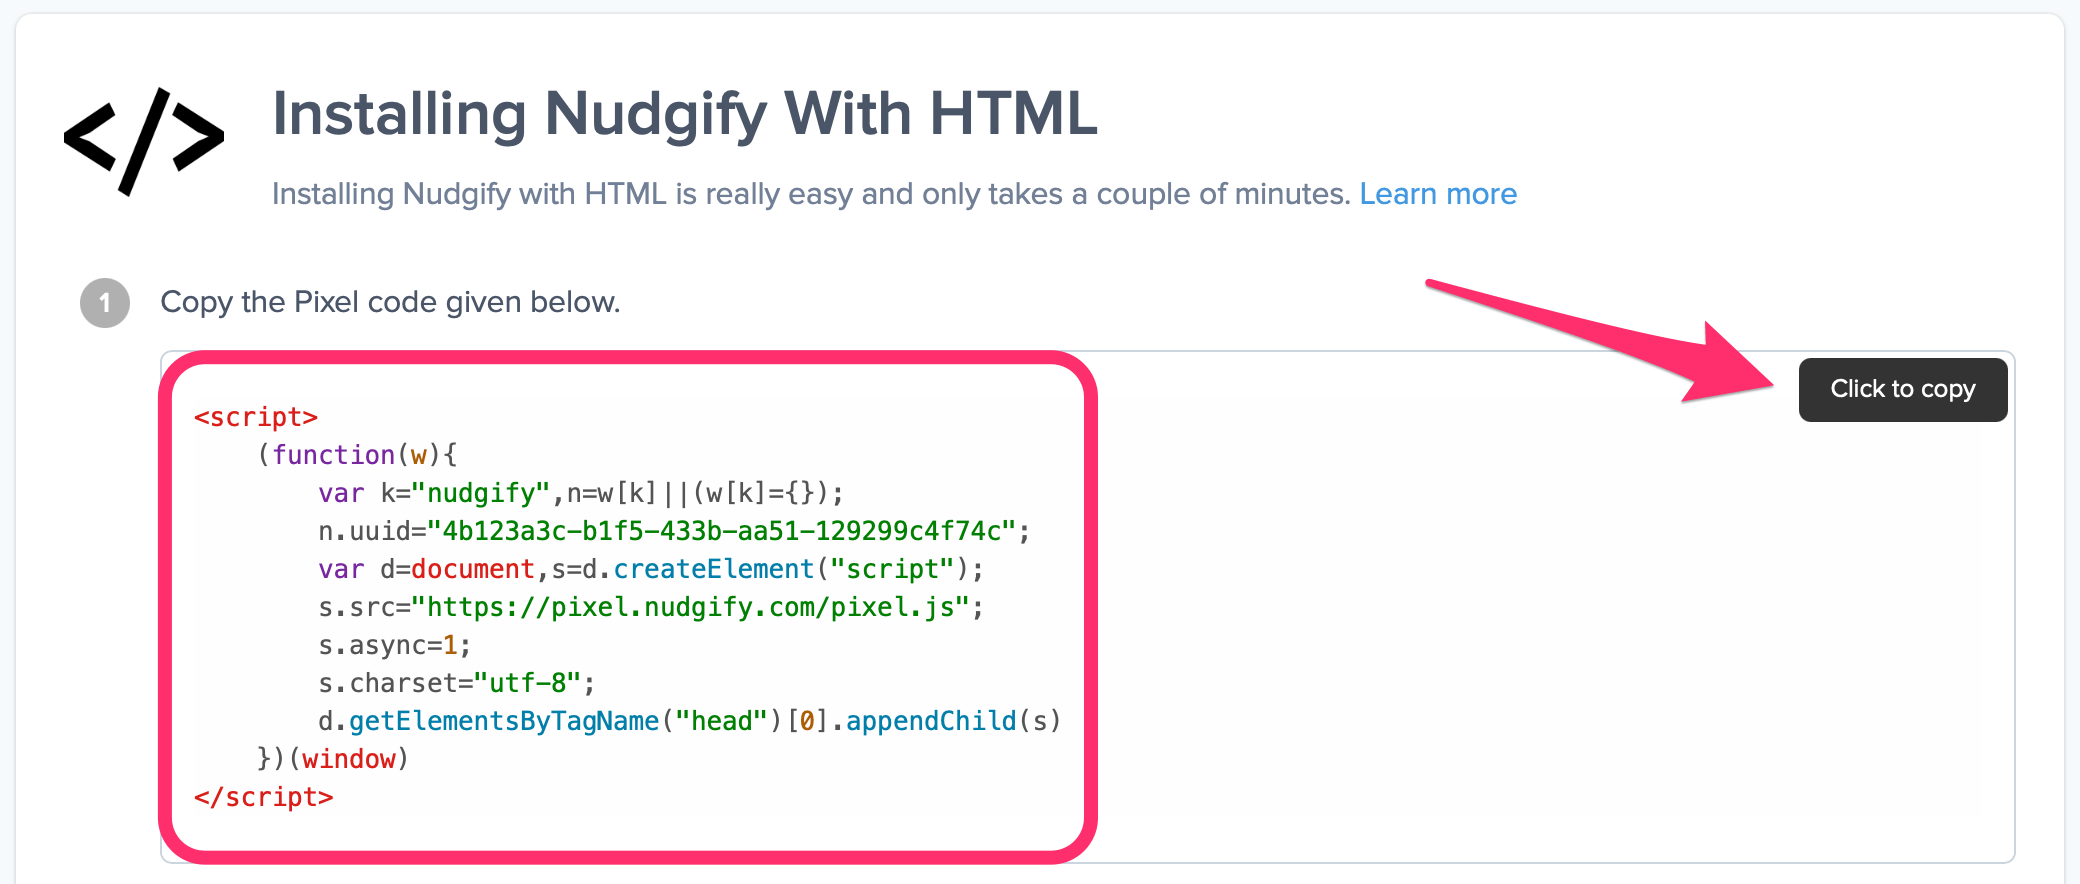
Step 1: Copy your Nudgify Pixel code
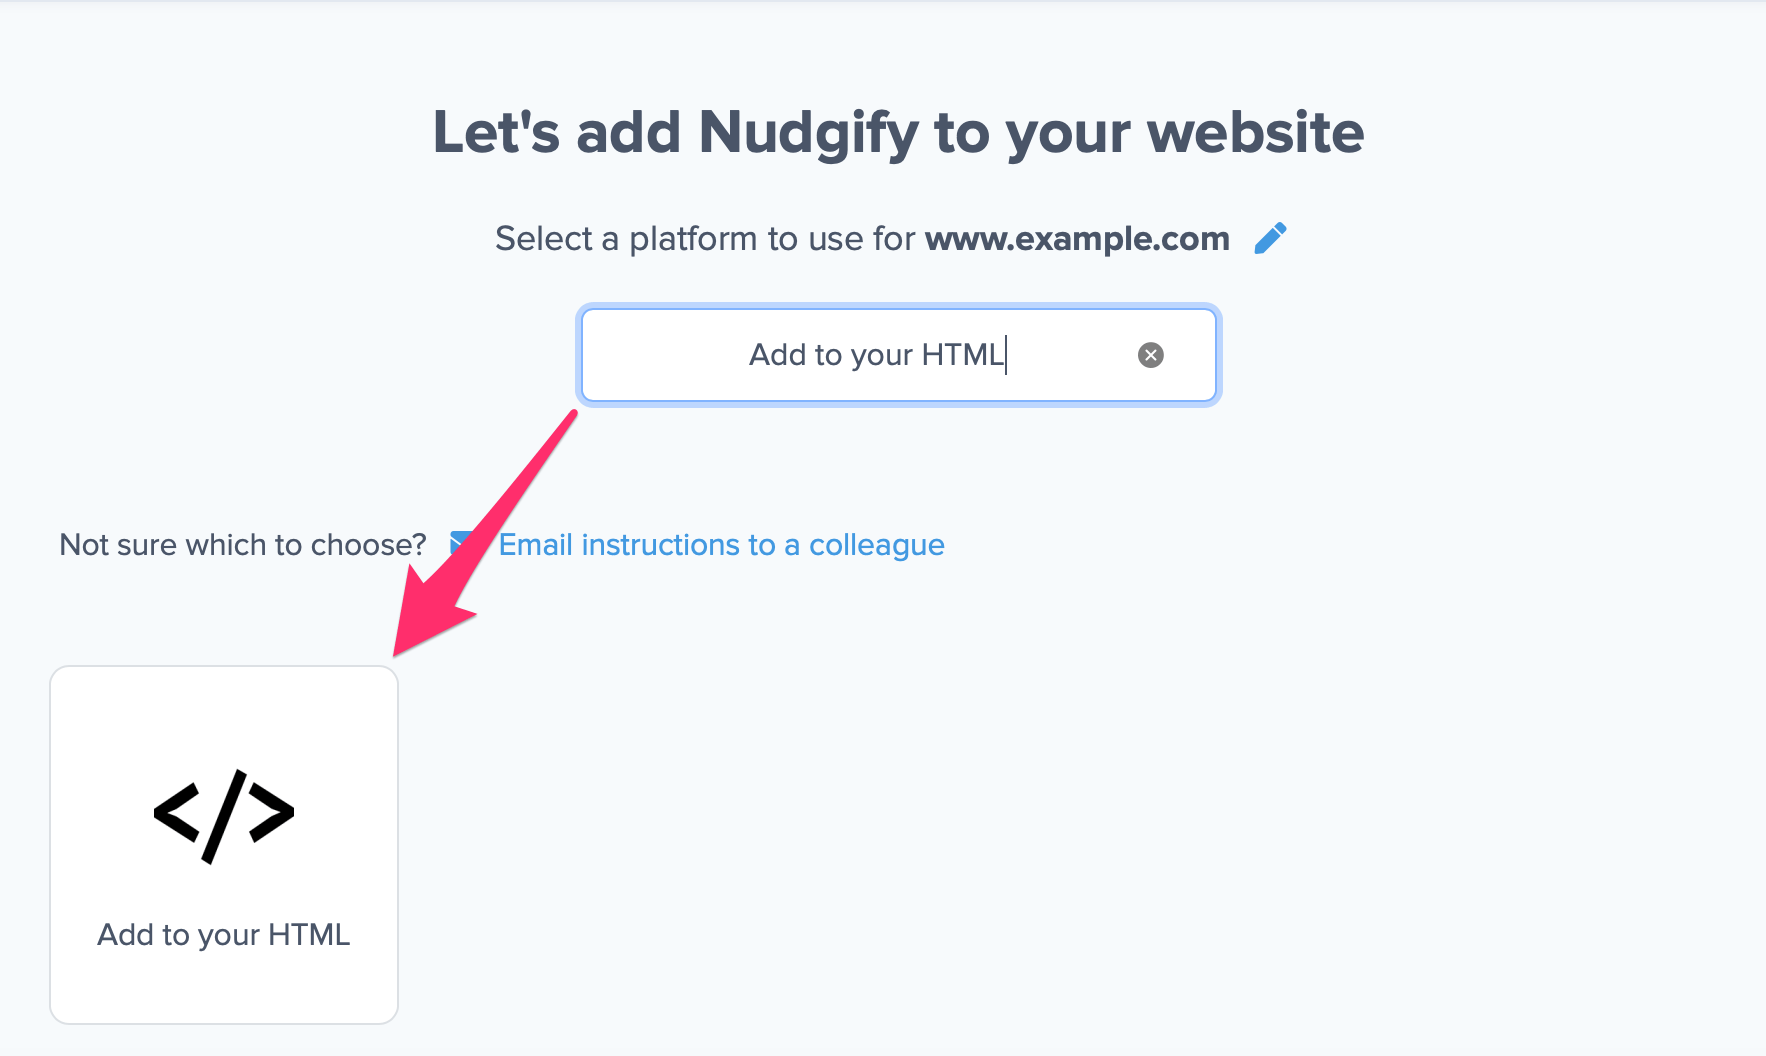
Just sign up for Nudgify and select Add to your HTML
Now a window will open in which you can see a step-by-step guide on how to install your Nudgify Pixel. This Pixel is nothing more than a small line of code that you need to copy and paste into the code of your website. The Pixel is what we use to display the Nudges on your site.
Copy your Nudgify Pixel code:
Step 2: Add the Pixel code to Podia
To install your Nudgify Pixel code:
- Access your “Site Settings”
- Navigate to the “Analytics tab”.
- Scroll down until you see the “Third-party code” section
-
Paste your Nudgify Pixel code the tracking into the text area labelled “Website tracking code”

- Click on Save changes.
- You can use the Form AutoCapture option to track signups automatically.
Need more help with Podia? Follow the instructions from their documentation on how to Install advanced analytics
Step 3: Check if the Pixel is installed
Go to your Profile icon, select Sites & Organizations, and choose the website you want to check. Then click the <> symbol and select Check Pixel to verify that the Pixel has been installed correctly.

Do you see the green “Pixel is installed correctly” message? Congratulations, you have installed the Nudgify Pixel on your website and you will be able to see the Nudges you create on the targeted pages!
Do you not see the green “Pixel is installed correctly” message?
This means that you haven’t yet installed your Pixel. Double check that you completed all the steps to install your Pixel and try again.
Is your Pixel still not found?
Click the black bubble in the app where we can assist you.
